French (FR)
 English (ENG)

 French (FR)
 English (ENG)


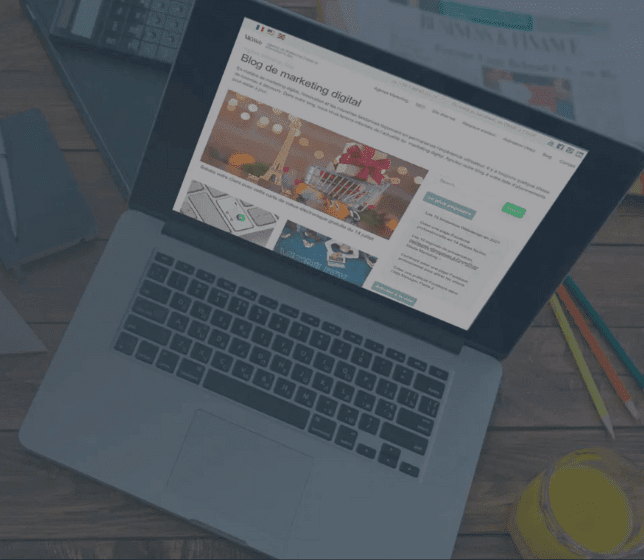
Dans les articles précédents, nous avons examiné les étapes successives de création d’une page de destination performante, à commencer par l’étude des besoins de l’audience cible, jusqu’aux principes fondamentaux du design.
Quatre chapitres ont été consacrés à ces étapes :
Chapitre 1. « Landing Page » : définition, exemples, application.
Chapitre 2. Étapes de création d’une « landing page ».
Chapitre 3. Parties composantes d’une « landing page » : blocs fonctionnels.
Chapitre 4. Principes de conception d’une « landing page ».
Nous abordons le chapitre final de notre guide. Il est consacré à la préparation au lancement d’une landing page.
Il y a plusieurs possibilités de construire une landing page : la commander à un pigiste, la concevoir sur un éditeur de sites, acheter une maquette toute prête et confier la mise en page à un informaticien.
Si vous décidez de créer votre site à l’aide d’un constructeur, cela ne pose pas de problèmes, d’autant plus que dans notre article « Éléments du landing : blocs fonctionnels » nous avons examiné chaque composant de la page de destination et sa conception à l’aide de l’éditeur Wix : vous ne devez que choisir les blocs qui correspondent à votre prototype.
Quelques mots à propos des éditeurs des pages de destination
En principe, les éditeurs des landings sont recommandés pour tester rapidement un business. Si un landing assemblé sur un éditeur donne des résultats, vous pouvez être sûr et certain qu’une page de destination normalement construite sera encore plus performante. Au contraire, si les résultats ne sont pas satisfaisants, il n’y a aucune possibilité d’en tirer une conclusion valable. Probablement, votre idée n’était pas bonne, ou peut-être l’éditeur n’était pas suffisamment élaboré et vous avez essayé d’insérer une idée innovante par le biais de techniques trop conventionnelles ou inadaptées.
Pour tester une nouvelle idée, utilisez toujours les éditeurs de landings. Mais si vous connaissez bien votre niche du marché, vous n’en avez pas besoin.
Coopération avec les pigistes
Lorsque vous travaillez avec un pigiste, la première chose à faire est de vérifier votre spécification technique à l’aide de la liste de contrôle du contenu de la landing page.
Ensuite, vous choisissez un spécialiste et vous lui fixez sa mission. Préparez-vous à ce que les pigistes préfèrent la liberté (c’est pourquoi ils ne sont pas dans les bureaux) et choisissent leurs propres heures de travail. Assez souvent, ils ne remettent pas le travail à temps.
Vous devez savoir comment assurer la réalisation des tâches à temps tout en respectant les exigences techniques, et pour cela vous devez contrôler le travail des pigistes.
Composez une spécification technique détaillée (avec un prototype de landing page et une liste de contrôle), parce que tout ce qui est mal compris sera fait à contre-courant.
Comment choisir un designer ou tout au moins un maquettiste ?
Les choix ne sont pas très difficiles à condition de bien définir le profil et d’affiner les recherches sous forme d’entonnoir. Il faut d’abord composer une liste de spécialistes et leur envoyer des lettres avec une description de votre commande, il ne reste ensuite qu’à attendre leurs réponses avec les prix et les délais. Vous recevez des réponses et discutez à propos des détails.
Qu’est-ce qu’un entonnoir vient faire ici ? Supposons que vous avez une centaine de pigistes sur votre liste. Ils ont tous reçu votre spécification technique, mais 20 sur 100 vous ont répondu dont 5 seulement ont indiqué des prix et des délais qui vous conviennent. Il vous reste de parcourir les portfolios de ces cinq candidats. Au lieu d’en examiner une centaine : vous évitez des efforts inutiles et gagnez du temps. Finalement, vous engagez un designer avec le meilleur portfolio où la pire des maquettes vous a plu.
Aussi triste comme il est, mais la page que l’artiste va faire pour vous aura l’air de la pire de ces maquettes. Ne vous y trompez pas, il ne faut pas lui demander la lune parce qu’il a réussi quelques projets avant. Si son échantillon le plus laid vous convient, n’ayez pas peur de l’engager.
Il y a des choses que vous devez prendre en considération en dressant la liste des designers. Premièrement, c’est leur spécialisation. Il faut chercher un webdesigner, de préférence celui qui s’occupe des sites et, encore mieux, de la conception des pages de destination.
N’acceptez que ceux qui puissent fournir des échantillons de leur travail, ignorez les candidatures sans portfolio.
Vérifiez le classement du designer et lisez les avis que ses clients ont laissés sur le site des pigistes. Beaucoup de sites ont des tableaux de classement où les clients peuvent apprécier les œuvres des concepteurs en mettant des signes « – » et « + » ou d’autres notes.
Les avis, les commentaires écrits — voilà ce qui est vraiment important. Il est facile de mettre un minus, mais il faut quand même donner une explication. Il doit y avoir un motif sérieux pour écrire une critique négative avec des preuves que le designer n’a pas pu accomplir la tâche qui lui a été confiée, par exemple, n’a pas respecté la date limite.
Combien de pigistes doivent être sur la liste ? Envoyez la spécification technique à 20 – 40 personnes. C’est pleinement suffisant pour trouver un bon spécialiste, mais plus la liste est longue plus vous avez de chances de respecter les délais et de trouver celui que vous cherchez.
Message. Nous préparons un seul message pour tous les designers. Qu’est-ce qu’il faut écrire au juste pour qu’ils vous comprennent ?
Il faut assigner la tâche — par exemple, de dessiner une maquette d’une page de destination.
Il faut fixer le délai — par exemple, « dessiner une design-maquette d’une page de destination en trois jours ». Trois ou quatre jours c’est suffisant pour dessiner un landing.
Il faut absolument ajouter au message le prototype de la page (votre projet).
- You must send the prototype of the landing page with your first message to the designer.
A design quality checklist should also be added to your message, indicate that the design should conform to this checklist, this will allow the artist to judge if they are capable of it.
Ask right away when the designer will be able to take care of your project, what his remuneration will be and specify the terms of payment.
These five points should be listed in your first letter.
You will receive responses almost immediately. And you already know what to do next.
Finally, you chose a designer and assigned him his task. But how to guarantee the quality of the work as soon as possible?
The work should be divided into two stages: the design of the first screen and the design of the rest of the page. More precisely, you agree with the artist that he draws the first screen for you and sends it to you for corrections and, then, he begins to take care of the other blocks.
At the same time, the delivery time for each stage of the project must be strictly fixed: for example, Wednesday 12:00. It is best to do this in writing.
When you collaborate with a freelancer, your shyness does not work in your favor. Don’t hesitate to remind your supplier of your order, it’s worth it. You must prepare a reminder letter the day before: “Hello, Serge. Do you remember that tomorrow at noon you must send me the model of the first screen? I can’t wait to see her. THANKS “. Your letter should be courteous, but resolute.
If you can’t afford a designer, at least find a layout designer. Quite often, 200 euros can be an exorbitant expense for you. But if you have the time, it is possible to build a one-page site using the templates.
First choose a suitable model. For example, on the Envato site find and download beautiful templates for a landing. It is true that it will be necessary to pay from 40 to 50 dollars on average for a model. But on the other hand, there are no problems with freelancers.
What to check in a template: colors, fonts, placement of blocks, and overall design. It is important that you like the template as a whole, the layout of the blocks can be changed at the layout stage.
When you have a model, you start looking for a model maker instead of a designer and follow the same recommendations. Just change the search category “designer” to “site layout”.
The work of the designer costs less, because his task will be to “lay out a landing according to a ready-made model”. But it is necessary to control the freelancer so that he completely redoes the model on the example of the prototype.
Verification of work.
You must already be wondering how to control the work of the designer and the model maker. To do it right, I recommend using our design and layout checklist. If in the previous paragraphs you have done everything as it should be, the specialists will do their job in accordance with the checklist.
Some links to freelance scholarships
1. Malt
2. Creme de la creme
3. Freelance
4. 404 Works
5. Cowokees
6. Kang
Layout
In general, layout is the process of transforming a PSD image into a document suitable for the web environment. As with art design, don’t try to do it yourself, but hire a model maker working remotely.
You have to know the four simple rules of cooperation with a model maker.
- Choose a good designer. Do it at the search example of a designer.
- Attach the task to him in the same way as to the designer.
- Constantly remind him of yourself and your project during the time of your cooperation.
- Check the mockup.
You can control the quality of the mockup without even knowing the HTML coding. To make it easier for you, use our checklist.
- Validate the mockup on the Markup Validator http://validator.w3.org . Click on the link and enter the URL of your site, then click on the “Check” button. After validation, send the link to your designer to make the corrections.

- Check if the page is displayed correctly in the following five browsers: Chrome, Firefox, Internet Explorer, Opera, Safari. It’s the modeler’s job, but modelers are careless and don’t give a damn. It is better to follow them closely.
- Check if the page displays correctly on a smartphone and tablet.
- Check the display by changing the screen resolution.
- The display speed must be less than 4 seconds.
- The smallest font size (excluding headings) is 14 to 18 pixels.
Here is a summary of the main requirements of the model.
Domain
The essential criteria for the choice of domains.
- The domain name should be short and intelligible. The domain name should be easy to remember and reproduce. However, there are no recommendations regarding the number of characters in the name. Just remember that a short name is preferable. Try to use domain names with a maximum of 10 characters.
- The domain name should be easy to write. Suppose your future customer makes a mistake by entering the domain name and accesses another site, this is a scenario that does not suit you at all. Avoid hard-to-pronounce foreign words, unusual letter combinations, and anything that can cause typing errors.
- Choose a domain from an appropriate registration area. A domain zone is distinguished by a suffix or “extension” at the end of the name (.com, .net, .org, etc.). The specialists are not unanimous as regards the choice of the zone. Some of them recommend the .com zone which is the oldest on the web and the most well-known (people prefer popular, that’s why they believe domains with a .com extension are more reliable). But if your site only targets a single country or region, feel free to choose a domain from the corresponding area.

Buy your domain wherever you want. For example, the price of a domain in the .fr zone on ionos.fr https://www.ionos.fr/domaine/fr-domaine starts from 1 euro per year.
Accommodation
You are absolutely free to pay for the hosting service that suits you. You can try lws.fr — it is a reputable provider of hosting services.

The security of your site and your server largely depends on the hosting service provider. Before payment, ask what technical protection instruments the supplier has. Check if the helpdesk responds quickly.
After paying for the hosting services, send your login and password to the designer. Ask him to check everything and make adjustments. After which, you must modify your login and password so that he can no longer access them without your permission.
Order from the form.
When a visitor fills out the form on your landing and clicks the button, you should automatically receive a request to your email.
How to configure this process? You create an email box just for requests. Forward the link to the designer. In the settings of the landing page, it indicates your mailbox to redirect all requests from the form there.
The form should be simple and easy to complete. Preferably, it should be in the form of a small table.
What mandatory input fields should be included in the form?
- They are not numerous: name, e-mail, telephone number.
- And the title of the form. If you have forms at the top, bottom and center of your landing, you must give a title to each of them. A month later, you may realize that most orders come from the form in the center of the page. You look at what call-to-action (CTA) is in that form and what visitors are most interested in. And you edit the form at the top of the page, given your findings, to increase the conversion rate.
- The URL is the address of the site found in the address bar. You can enter it and copy it into the form. If you use UTM tags and other referral means in your ad, the designer can program a handler that breaks these tags down and passes them to the order form. So you can understand which traffic source is delivering the most orders from.
- You can also relay to your e-mail inbox the time at which each order was sent. And determine the periods when the orders are the most numerous. This data will help perfect your customer conversion system.
- Also configure the SMS notification system. When an order arrives, you receive an SMS — so you can process it faster.
Thank you page
Once the visitor has filled out the order form and clicked the button, they should be taken to the thank you page.

It’s a very simple page, you don’t have to invent anything. The header of the page reproduces that of the landing and below are a few words of thanks: “Thank you for your order, our manager will call you back in N minutes”. Nothing special, but absolutely must be done.
The thank you page can also be used to give a gift in the form of a short free video, a link to a webinar, a service or merchandise or even to express personal thanks to the customer from the director ; sometimes, there is a video demonstrating the product concerned and its values.
Try offering the person browsing that page a micro-conversion—subscribing to a blog or offering to join a social networking group or click the “tell friends” button.

First, this page will be used to formulate your objectives. Google Analytics tracks conversions from the thank you page well.
Second, it is able to increase the landing conversion rate and retain customers.
Installing a counter and setting the goal on Google Analytics
In order to improve a site, it is necessary to know well which public visits you and for which reasons. Counters provide insight into where visitors are coming from, what factors prevent them from making purchases, and how long they spend on the landing page.
The most popular counter is the Google Analytics analysis and statistics system. This counter collects statistics on site visitors and has many analysis tools.
To add a counter to your landing, you must visit https://analytics.google.com/. Further, the action algorithm is simple:
- Sign up for Google Analytics;
- Receive a code and copy it on the site.

It is best to insert the meter code closer to the top of the page to ensure data accuracy. Some visitors make flash entries on the site and the counter does not have time to register them. The best place for the counter is immediately after the ‘<head>’ tag. If you don’t know where to place the counter, leave this task to the designer.
Next, in the “Goals” tab, add a goal to your thank you page.
Let’s review your actions in more detail.
1. Open Google Analytics.
2. In the “Admin” panel, go to the “View” tab of the “Objectives” section and click on “New Objectives”.

3. Next, configure the lens settings. In the pop-up window you write the name of the objective, for example “Thank You Page” and the identifier / group which are assigned to each objective (there are 20 in total).
4. To specify the lens details, select the “Lens Configuration – Template”. Goal Type: Destination, “Equals” — specify the exact URL of the thank you page.

The name of the objective: “Thank You Page”.
The type of objective: “Destination”.
The goal will be achieved when the visitor lands on the thank you page.

Suppose that the address of the thank you page is ‘https://site.fr/thank-you/’ It must be copied into Google Analytics. Click “Save” — the goal is created!
Checking the landing page before launch
What must be checked before launching the landing page?
1. Check if the phone shown on the page is working well. If you dial the number, the manager should answer right away.
2. Check if the orders arrive at the specified email box. To control this, submit commands from every form on your page. ‰
3. Check if the SMS notification of orders arrives immediately.
Practical task:
Select freelancers and build a landing page. Configure the analytical system.
Chapter 5 Highlights
- The selection of freelancers. Pay attention to the candidate’s specialization, portfolio, review rankings and customer reviews. Use the funnel method in your research.
- Strictly control deadlines. Divide all the work into two stages: the design of the first screen and the design of the landing as a whole. Write down deadlines and remind your project designer regularly.
- After the layout, proceed to the analytical system configuration. Choose a domain and a hosting service. Configure sending commands from forms. Install the counters and set the goals.
- The thank you page is an indispensable part of the landing page. The thank you page includes the landing header and the phrase “Thank you for your order.” Our manager will call you back in N minutes”. One of the purposes of Google Analytics is for the visitor to reach the thank you page.
Conclusion
So, you’ve learned the fundamentals of creating landing pages. Remember that each of your landing pages can be improved after testing and optimization. Consultations of the VKWeb agency will allow you to build a successful and conversion-oriented landing page. And I encourage you to let us know in your comments!
")